Snoring is a common problem, and it is not limited to overweight men. Women can have snoring problems too, and weight is not always a factor. Any living creature that breathes can snore, and the sound can create many sleepless nights for anyone that can hear it.
I never realized that I snored, and when I found out I was embarrassed. Embarrassment soon turned to frustration when I realized that I was keeping someone else awake at night. I had to do something about it. I tried cheap nose pieces that were designed to open the nostrils and breathing passages, but they did not work. I recently bought a Stop Snoring Mouthpiece, and I have high hopes that it will work.
The instructions that came with the Stop Snoring Mouthpiece said to boil the water, but also said that it should not be scalding. The information was contradictory and made absolutely no sense. It also said to soak the Stop Snoring Mouthpiece for twenty seconds in the hot water. If the water was not hot enough to scald, I did not see how it would soften the plastic to mold it to properly fit my mouth. After a little research, I figured out how to mold and fit the Stop Snoring Mouthpiece, and I did not use the poorly written instructions that came with the product.
Necessary Supplies
To mold and fit a Stop Snoring Mouthpiece you will need a pan of water deep enough to cover it without touching the bottom or sides, the molding stick that came with the Stop Snoring Mouthpiece, the storage container that also came with the product, and a bowl of cold water, click this over here now.
Procedure to Mold and Fit the Stop Snoring Mouthpiece

Begin by filling the pan with warm water. Bring the water to a full boil, and turn off the heat. Allow it to sit for a few minutes to slightly cool. If the water is too hot it will ruin the product.
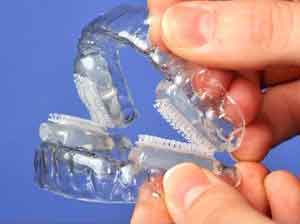
Next, push the molding stick into the slot in the front of the Stop Snoring Mouthpiece. Keep in mind that the indented area in the center should face upwards.
Fit and mold the Stop Snoring Mouthpiece by holding it in the water for about ten seconds. Do not let it touch the sides or the bottom of the pan. Also, do not keep it in any longer than ten seconds or it will lose the original shape. The water is meant to simply soften the plastic.
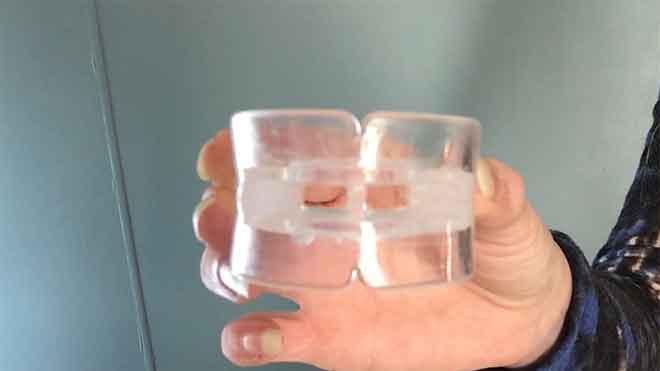
Once it is removed from the hot water, it will immediately cool down enough to put it in your mouth. With the curved area still facing upward, place the Stop Snoring Mouthpiece in between your top and bottom teeth. The bottom teeth should slightly overlap the top.
Hold the Stop Snoring Mouthpiece tightly in between the teeth while biting down firmly. Suck it inward to make it fit and mold the material to the teeth and gums. Use your fingers to press and smooth it. If necessary, reopen the breathing hole using the molding stick. Push it in through the front a few times, and move it side to side before the plastic fully sets.
After several seconds, remove it from your mouth, and place it in the cold water. The cool water will set the mold. The Stop Snoring Mouthpiece should fit snugly, and hopefully it will work to solve the problem. I plan on sleeping with mine tonight, and I will return to comment on how well it worked.